前置要求
- 一台服务器
- 一个域名
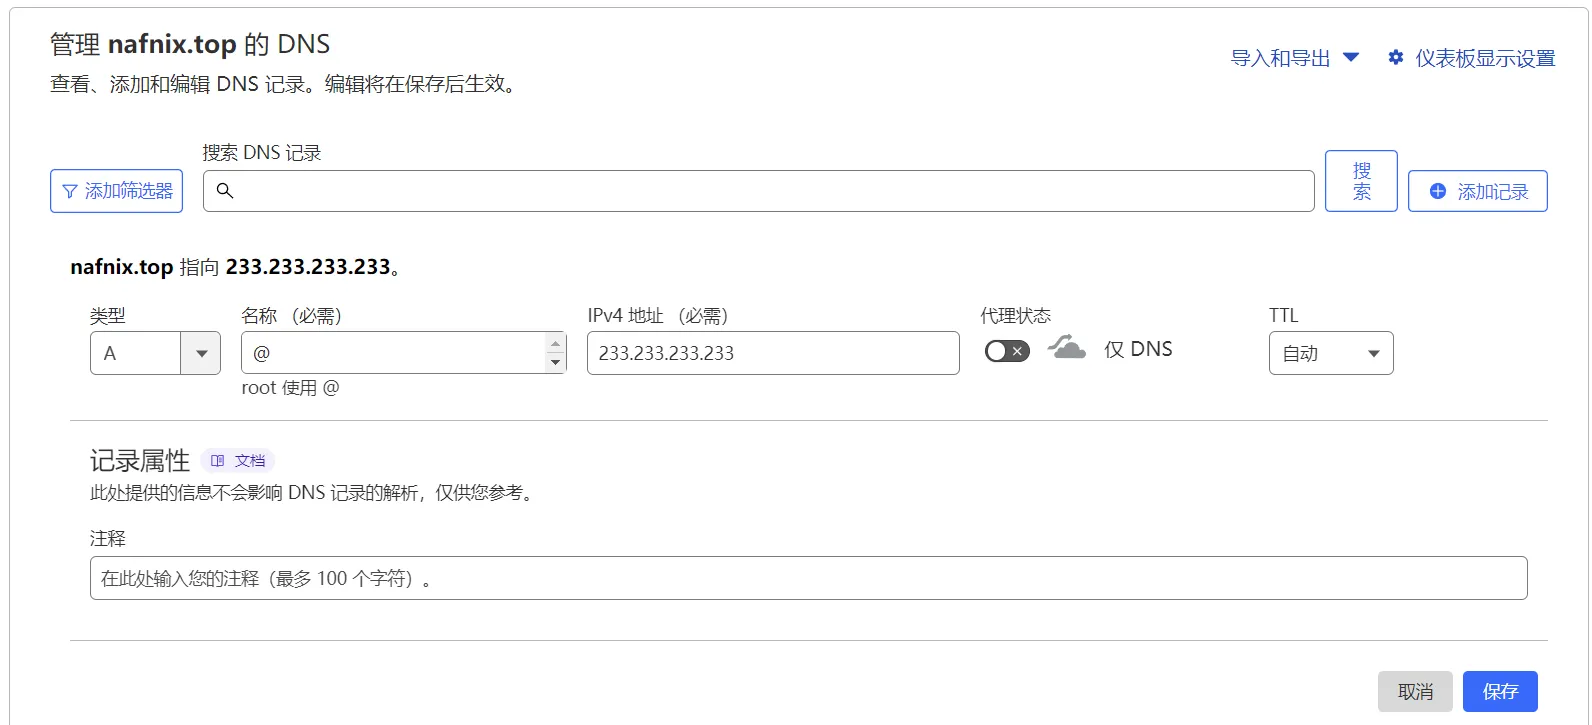
在 Cloudflare 上添加域名的 DNS 记录
假设服务器有个 IPv4 地址为 233.233.233.233,那么 Cloudflare 添加一条如下记录:
使用 docker compose 运行 swag
编写
-
创建 swag 文件夹用来存放 compose 文件:
mkdir ~/swag -
进入 swag 文件夹:
cd ~/swag -
创建 compose.yaml 文件:
touch compose.yaml -
在 compose.yaml 文件中填入下述内容:
services: swag: image: lscr.io/linuxserver/swag:latest container_name: swag volumes: # 将所有配置文件映射到此处 - ./config:/config ports: # 主机端口:容器端口 - 443:443 - 80:80 cap_add: - NET_ADMIN environment: # 使用 volume 时,主机和容器之间可能会出现权限问题,这里指定用户 PUID 和组 PGID 来避免此问题。 - PUID=1000 - PGID=1000 # 指定要使用的时区,参考: https://en.wikipedia.org/wiki/List_of_tz_database_time_zones#List - TZ=Asia/Shanghai # 你的顶级域名(如 customdomain.com),或者也可以是动态DNS(如 customsubdomain.ddnsprovider.com) - URL=yourdomain.url # 希望该证书覆盖的子域名,如果要覆盖所有的子域名,则使用 wildcard - SUBDOMAINS=wildcard # 要使用的 certbot 验证方法,可以是 http 或 dns,如果是 dns,那么还要设置 DNSPLUGIN - VALIDATION=dns # 我使用 cloudflare 解析我的域名,所以这里填写 cloudflare - DNSPLUGIN=cloudflare # 证书过期时通知的电子邮件地址 - EMAIL=yecao@tuta.io -
生成 config,在命令行执行下述命令启动服务:
docker compose up -
配置
cloudflare.ini。第5步执行完后等待一会儿,应该会在命令行末尾提示:
Error ……,看到提示后在命令行按下 Ctrl + C 中断服务。此时可以发现当前目录下多了个
config文件夹,然后编辑./config/dns-conf/cloudflare.ini文件,修改其中对应的内容。# Instructions: https://github.com/certbot/certbot/blob/master/certbot-dns-cloudflare/certbot_dns_cloudflare/__init__.py#L20 # Replace with your values # With global api key: dns_cloudflare_email = <你在 Cloudflare 上注册的邮箱> dns_cloudflare_api_key = <Cloudflare 的 global api> # With token (comment out both lines above and uncomment below): #dns_cloudflare_api_token = 0123456789abcdef0123456789abcdef01234567关于
<Cloudflare 的 global api>的内容,在 Cloudflare | Web Performance & Security 上获取: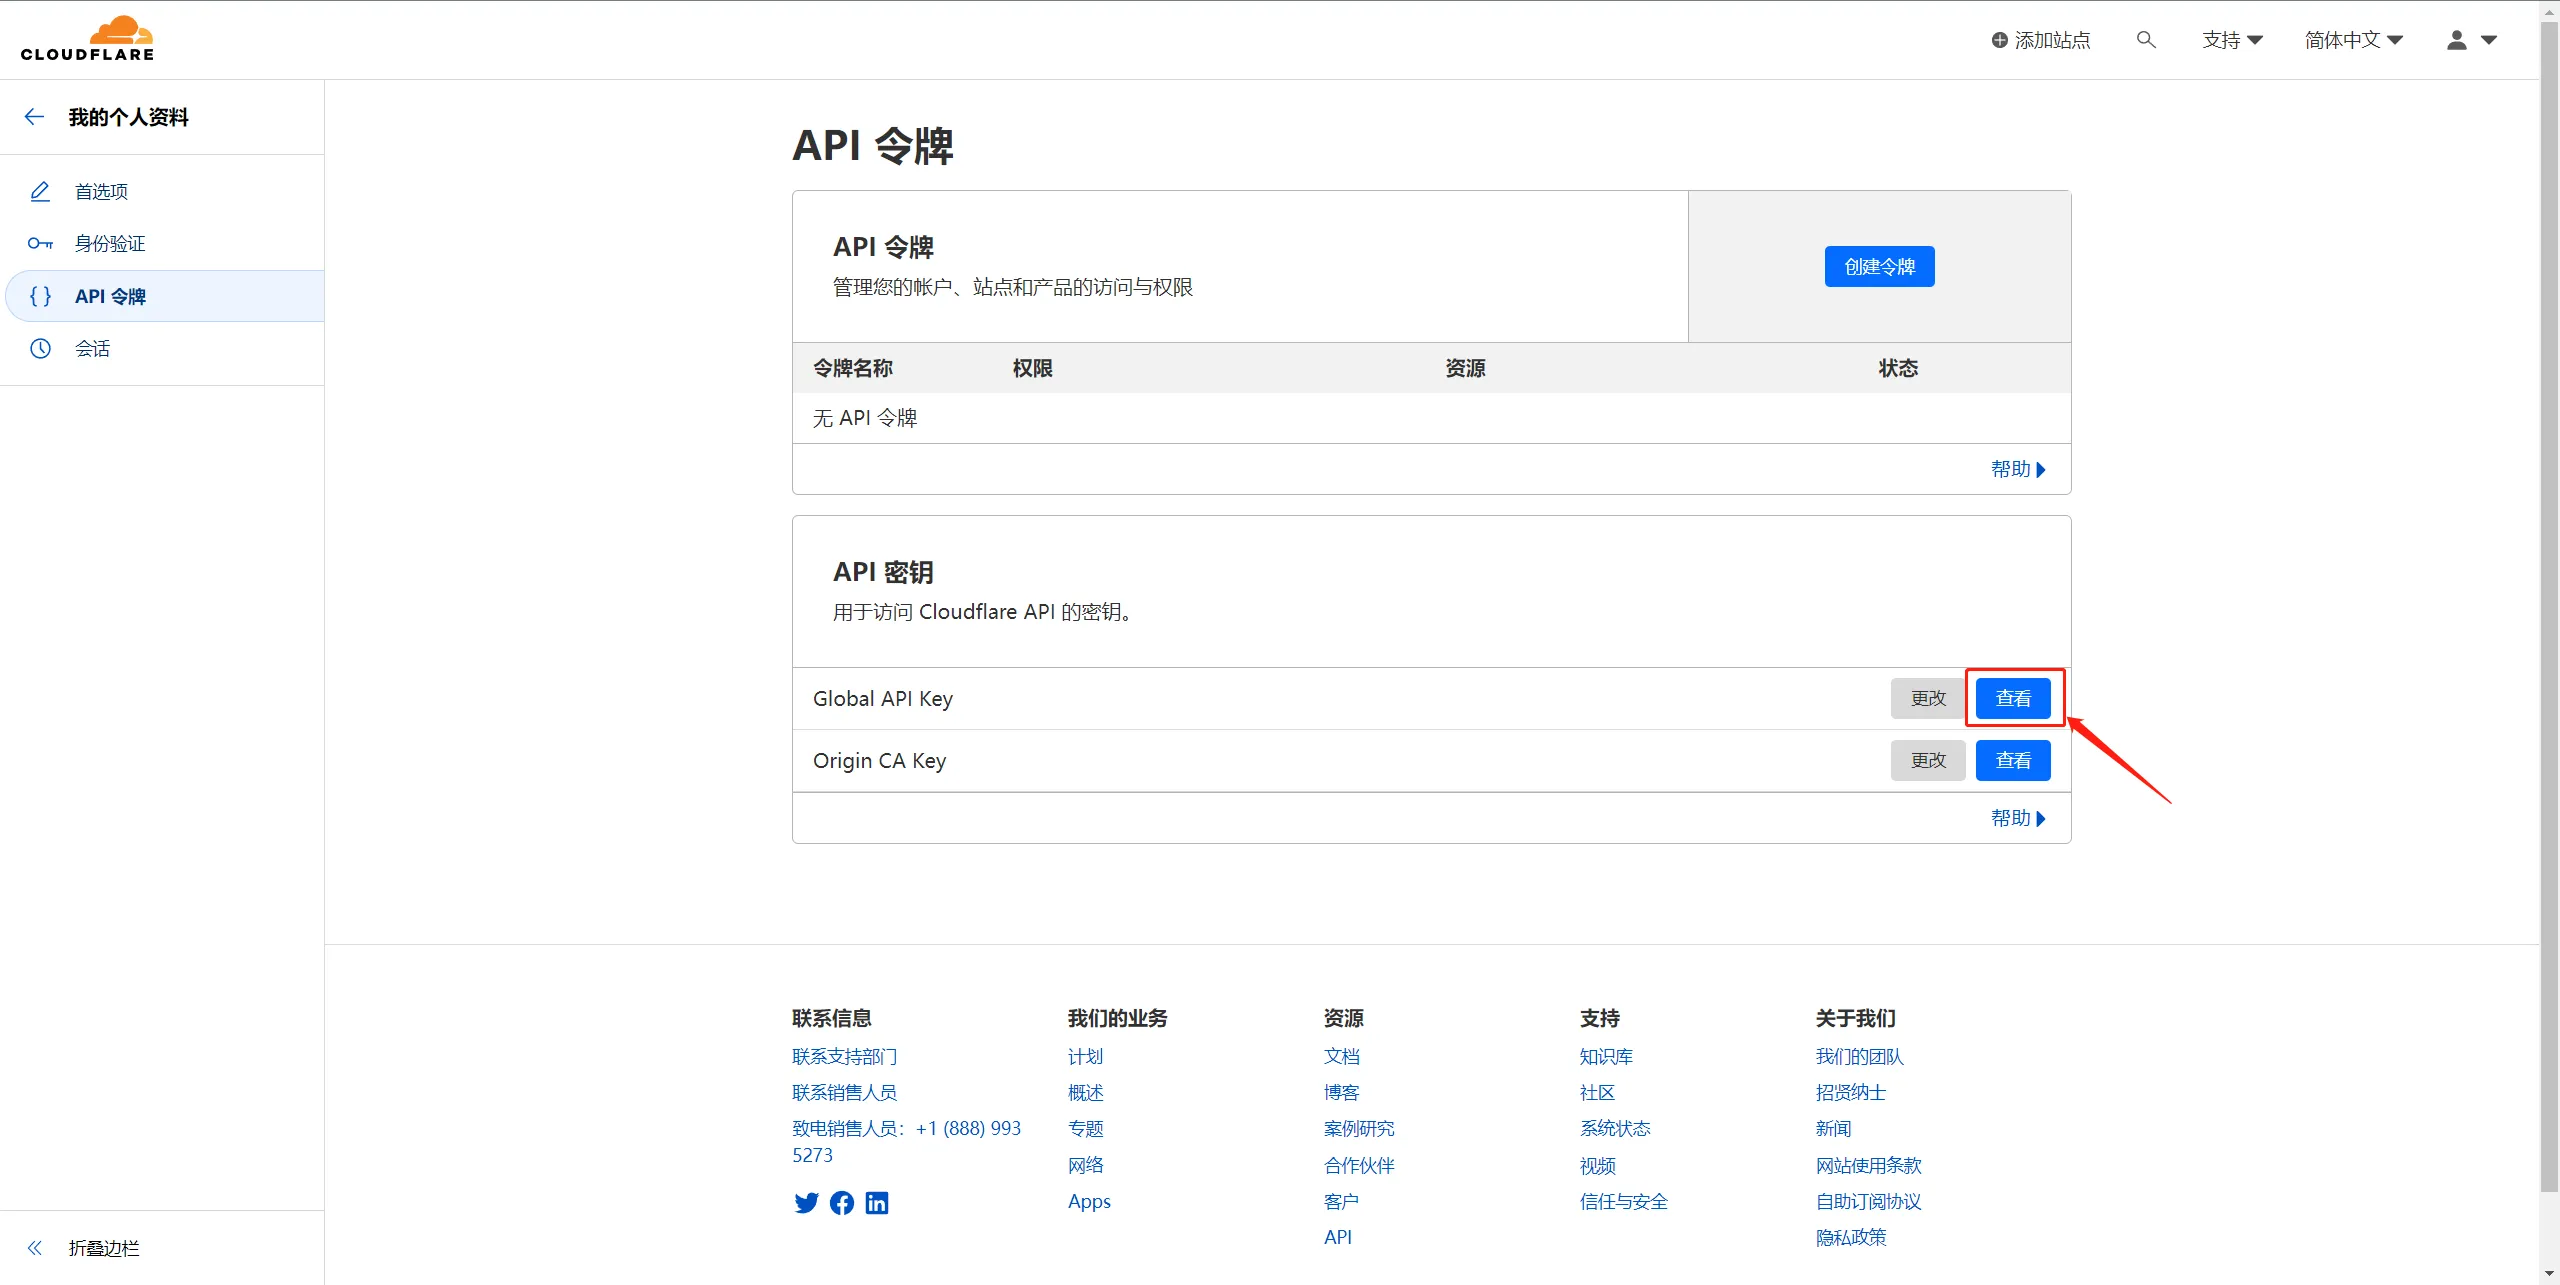
-
填写完成后,就再次启动这个服务看一下,在命令行执行:
docker compose up待服务器出现类似如下内容即表示完成:

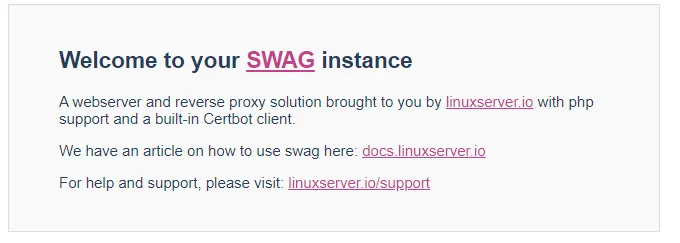
此刻访问你的域名,访问如下界面表示配置成功: